Klaviyo
Klaviyo is a unified data platform that integrates with many shop fronts.
This article will guide you through setting up Print.one with Klaviyo flows.
1 Initial Setup
First, open up our portal at https://portal.print.one.
In the sidebar, under Integrate , click on Integrations .
Find the Klaviyo integration, and click the blue Install button.
Go through the authorization flow, and you should end up back on our portal. Now with an installed Klaviyo integration!
2 Usage in Flow
2.1 Print.one Side
First, open up our portal at https://portal.print.one.
In the sidebar, under Integrate , click on Integrations .
Find the Klaviyo integration, and click the Setup webhook button.
You will now get a modal that should look roughly like this:
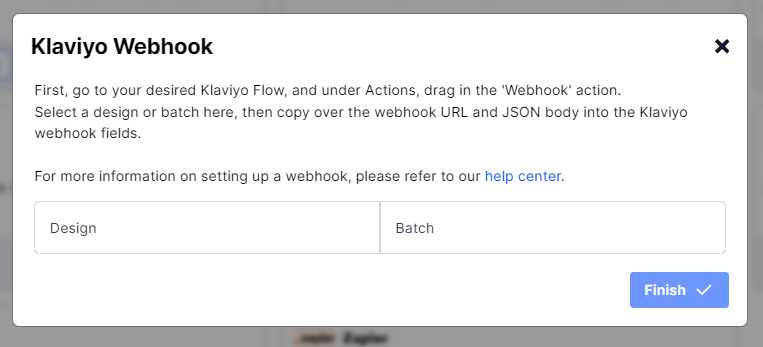 Depending on whether you want to use drip orders, or batch orders in your flow, select the Design or Batch option respectively.
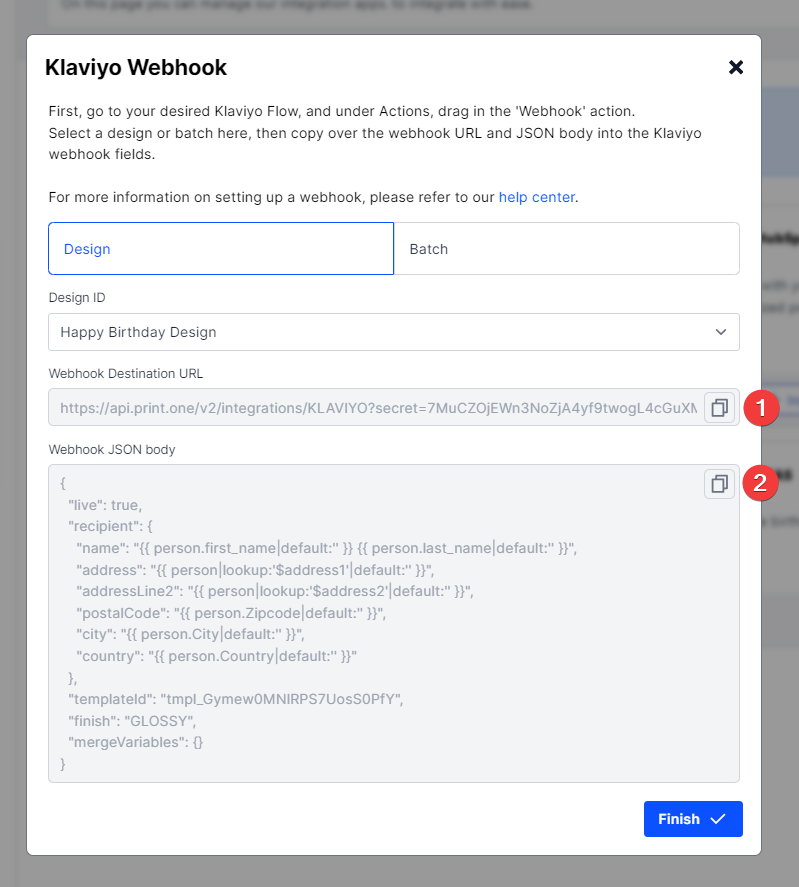
After that you will get a dropdown where you can choose from either your designs for drip orders, or your batches for batch orders. Choose one here now.
Two new fields should appear. Webhook Destination URL and Webhook JSON body . This should look something like this:
2.2 Klaviyo Side
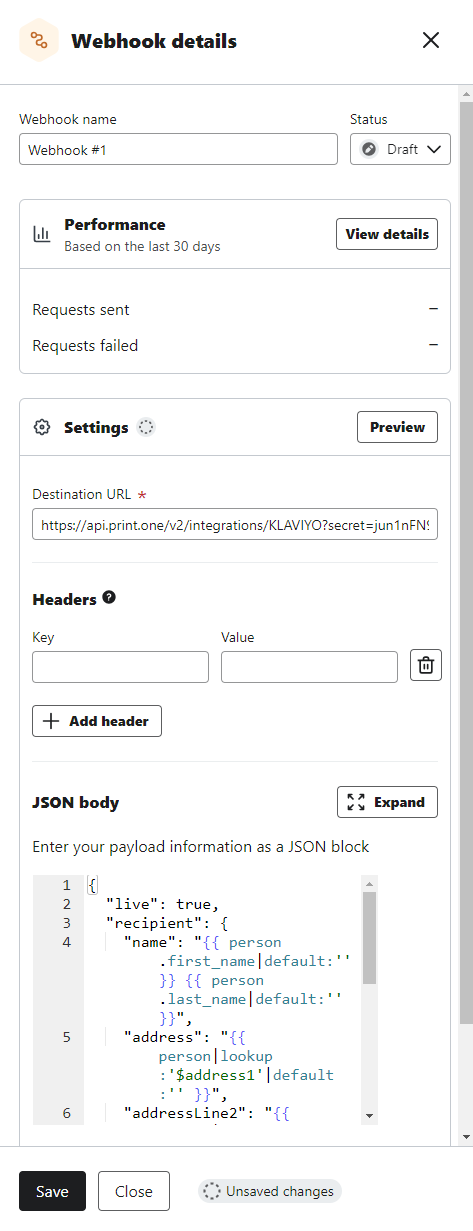
Open up your desired Klaviyo flow, and drag in a Webhook action from the left sidebar.
In this webhook action, copy over the webhook URL from the previous step's Webhook Destination URL(highlight 1) into the Klaviyo Destination URL field.
Next, copy the previous step's Webhook JSON body(highlight 2) in to the Klaviyo JSON body field.
Your webhook details should now look something like this:
 If you do not have any merge variables in your template, you can hit Save and are now done with integrating print.one in your Klaviyo flow. If you do have merge variables, continue to the next step.
2.3 Merge Variables
If your template contains merge variables, highlighted with a yellow warning icon in the bottom right corner of the set up webhook modal, you need to fill in the merge variables.
In the JSON body , there will be several instances of <fill in> . If the merge variable should be static text, simply replace this with the text you want.
If you want this to be a dynamic property of the profile being processed in the event, click the View profile & event properties button within the Klaviyo Webhook details menu. Simply click any of the properties listed, and it should copy some code to your clipboard.
Close the menu, and go back to your JSON body . Replace your desired <fill in> with the code you copied, and you are now done.
3 Testing
In order to create test orders instead of live orders. Go to the webhook settings, and under JSON body , replace live: true, with live: false, .
In order to go back to sending live orders, simply revert this change.
Need help?
If you’re stuck or have questions about this integration, our team is here to help. Feel free to reach out via support.