HubSpot
You can easily install the HubSpot app directly from our portal:
-
Log in to portal.print.one
-
Go to Integrate > Integrations > HubSpot and click Install
This article will explain how to implement Print.one in your HubSpot workflows. In doing so, the following steps will be explained:
Links to consult
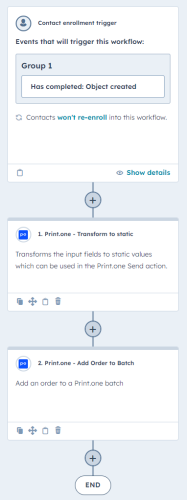
1. Creating a HubSpot workflow
Go to your HubSpot dashboard and click on "Automation" -> "Workflows" at the top of the menu. From there, click on "Create workflow" at the top right. Choose a template, or start from scratch.
2. Picking the correct step for your use case
Our Print.one Postcards app has three different steps to include in your workflow.

Send
This action should be used when you want to add 'Drip' orders.
Add Order to Batch
This action should be used when you want to add orders to a 'Batch'
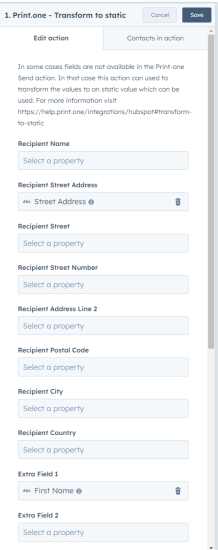
Transform to Static
In some cases, you may not be able to include all fields in the action to send cards. For this, there is the "Print.one - Transform to static" action, which converts these fields so they can be used
You do this by placing this action before "Print.one - Send" or "Print.one - Add to Batch."
 Next, configure "Print.one - Transform to static" with the fields that are not available. For all mandatory fields, there are fields with the same name to make them easy to find. If you need additional fields, there are 10 extra fields available for this purpose.
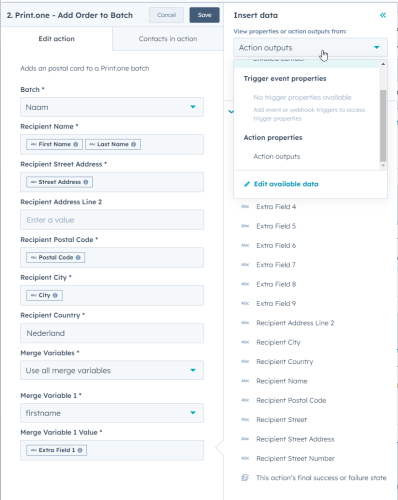
 Once you have filled these in, you can add them to your send step. To do this, you need to select the output from the previous step by using "Action outputs" on the next page.
 You can then use these fields for sending cards!
3. Configuring the workflow action
Map values
 First, you will have to 'map' all the values for the recipient. This requires the name, street + house number, postal code, city and country.
Furthermore, merge variables should be filled based on the selected template or batch. These values should also be mapped, based on the information from HubSpot you wish to fill into these merge variables.
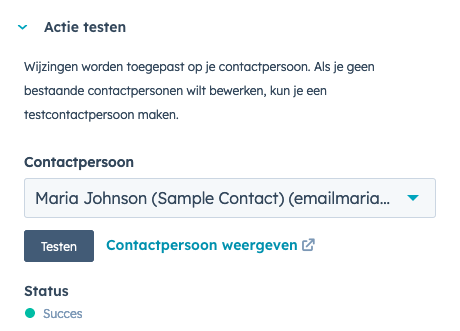
4. Testing the workflow
Now that the action is finished, it can be tested. To do so, click on "Testing" in the workflow menu. Click on "Testing" in the menu of the action. Enter the data you want to use for testing and click "Test". If everything went well, the workflow will have been executed successfully and a card will have been sent to the specified data. The map will also show up in the Print.one dashboard.
Help, something isn't working!
Don't worry, when testing the action, a clear error message will appear, for example the one below. In that error message you can clearly see which template is not set correctly.
Example
Should you still encounter a problem, you can always consult HubSpot's documentation.
Need help?
If you’re stuck or have questions about this integration, our team is here to help. Feel free to reach out via support.