Images
Learn more on how to add images to your cards.
What kind of image?
In B2B applications, the logo is often used for personalizing cards, but you could also think of a photo of:
the favorite product of your webshop customer
the team from the branch where your colleague works
the pet of your customer
These are just a few of the endless possibilities. In this article, we'll use the example of the logo of your prospect's organization, but the principle is the same for any type of image.
Image types
Using images
In your designs you can use the following images:
Any file format a regular browser supports (e.g. JPG, PNG, WebP etc.);
Color profile RGB or sRGB (no CMYK!);
300 dpi (for the correct sharpness);
For background images: use the dimensions of the desired card format. You can find the dimensions in the bottom right of the editor or see the design specifications page.
Hosting of images
You can upload images to our portal or in the editor and use them in your designs (max filesize = 20MB).
If you want to use images from an external source instead of uploading them to our portal, please keep the following things in mind:
Your server needs to be able to process a lot of requests when sending a lot of postcards;
A Google Drive folder is not sufficient and is very unstable;
Any orders with images that do not return a 2xx HTTP status code when rendering an order will fail.
We strongly recommend you upload your images to our portal or editor to ensure successful rendering.
When using a firewall to protect your static images below, use the information below to whitelist us.
IP address |
|
User Agent |
|
Personalize your cards with images
Dear {{First Name}}.
Most people are familiar with this form of personalization. However, personalized images are used less frequently. That’s a shame because they’re an excellent way to stand out. We'll explain how you can easily load a variable image for each recipient using Print.one.
What You Need
Let's get started! We'll begin by gathering the following ingredients:
Logos From the organizations you want to send a card to.
Mailing list In CSV format, with columns for the address details.
Design for a card A beautiful design, with a variable image space where we'll place the logo.
1. Preparing the logo’s
We begin by preparing the logos. It’s important that they have a consistent aspect ratio. In this example, we chose square logos, as they are easier to integrate nicely into the design of your card, but this is not strictly necessary.
Naming the Logos This is an important step to ensure that the correct logo is placed on the correct recipient’s card. In this case, we make sure the logo name matches the organization name. It looks like this:
Organization Name | Logo Name |
Example Company | ExampleCompany.png |
Print.one | Print.one.png |
Once you’ve done this, we can move on to the next step: uploading. Do you have your own online storage? Then you can simply use that and skip this step.
2. Uploading logos
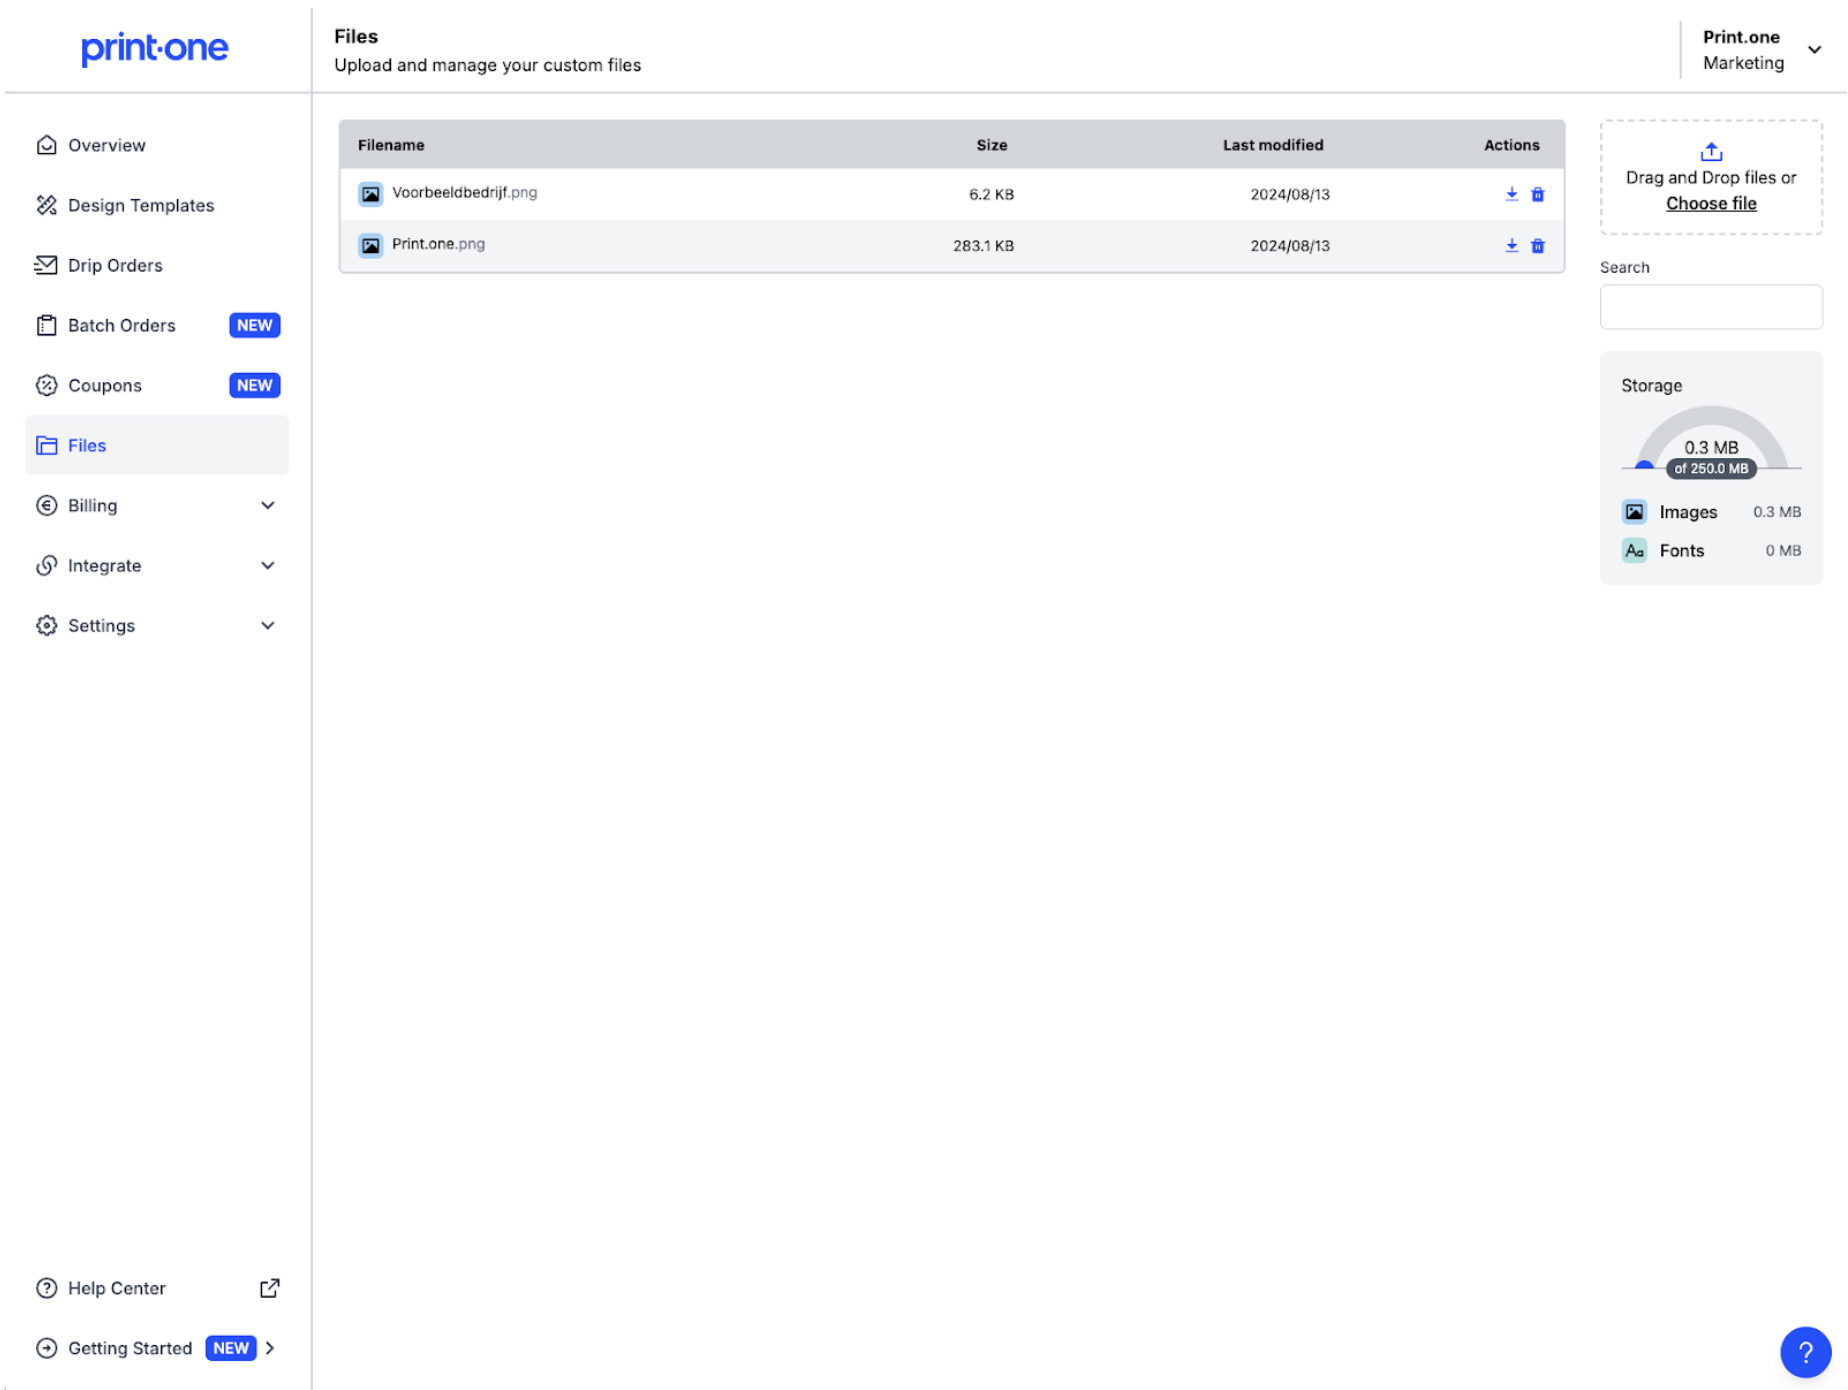
Now we will upload the logos, all with consistent naming, into our Print.one account. To do this, click on 'Files' in your account. In the upper right corner, click on 'Choose file'. Select all your logos and upload them. Your Print.one account comes with 250 MB of storage by default, so be mindful of the size of your files.
Once the upload is complete, you will see something similar to the screen below.
The logos are ready; now we will integrate them into your card design.
3. Insert Variable Image into your card
Now comes 'the secret sauce'. We are going to ensure that the logos are neatly placed exactly where you want them. To do this, navigate to ‘Design Templates’ and click on 'Create new design' or open a card that you've made previously.
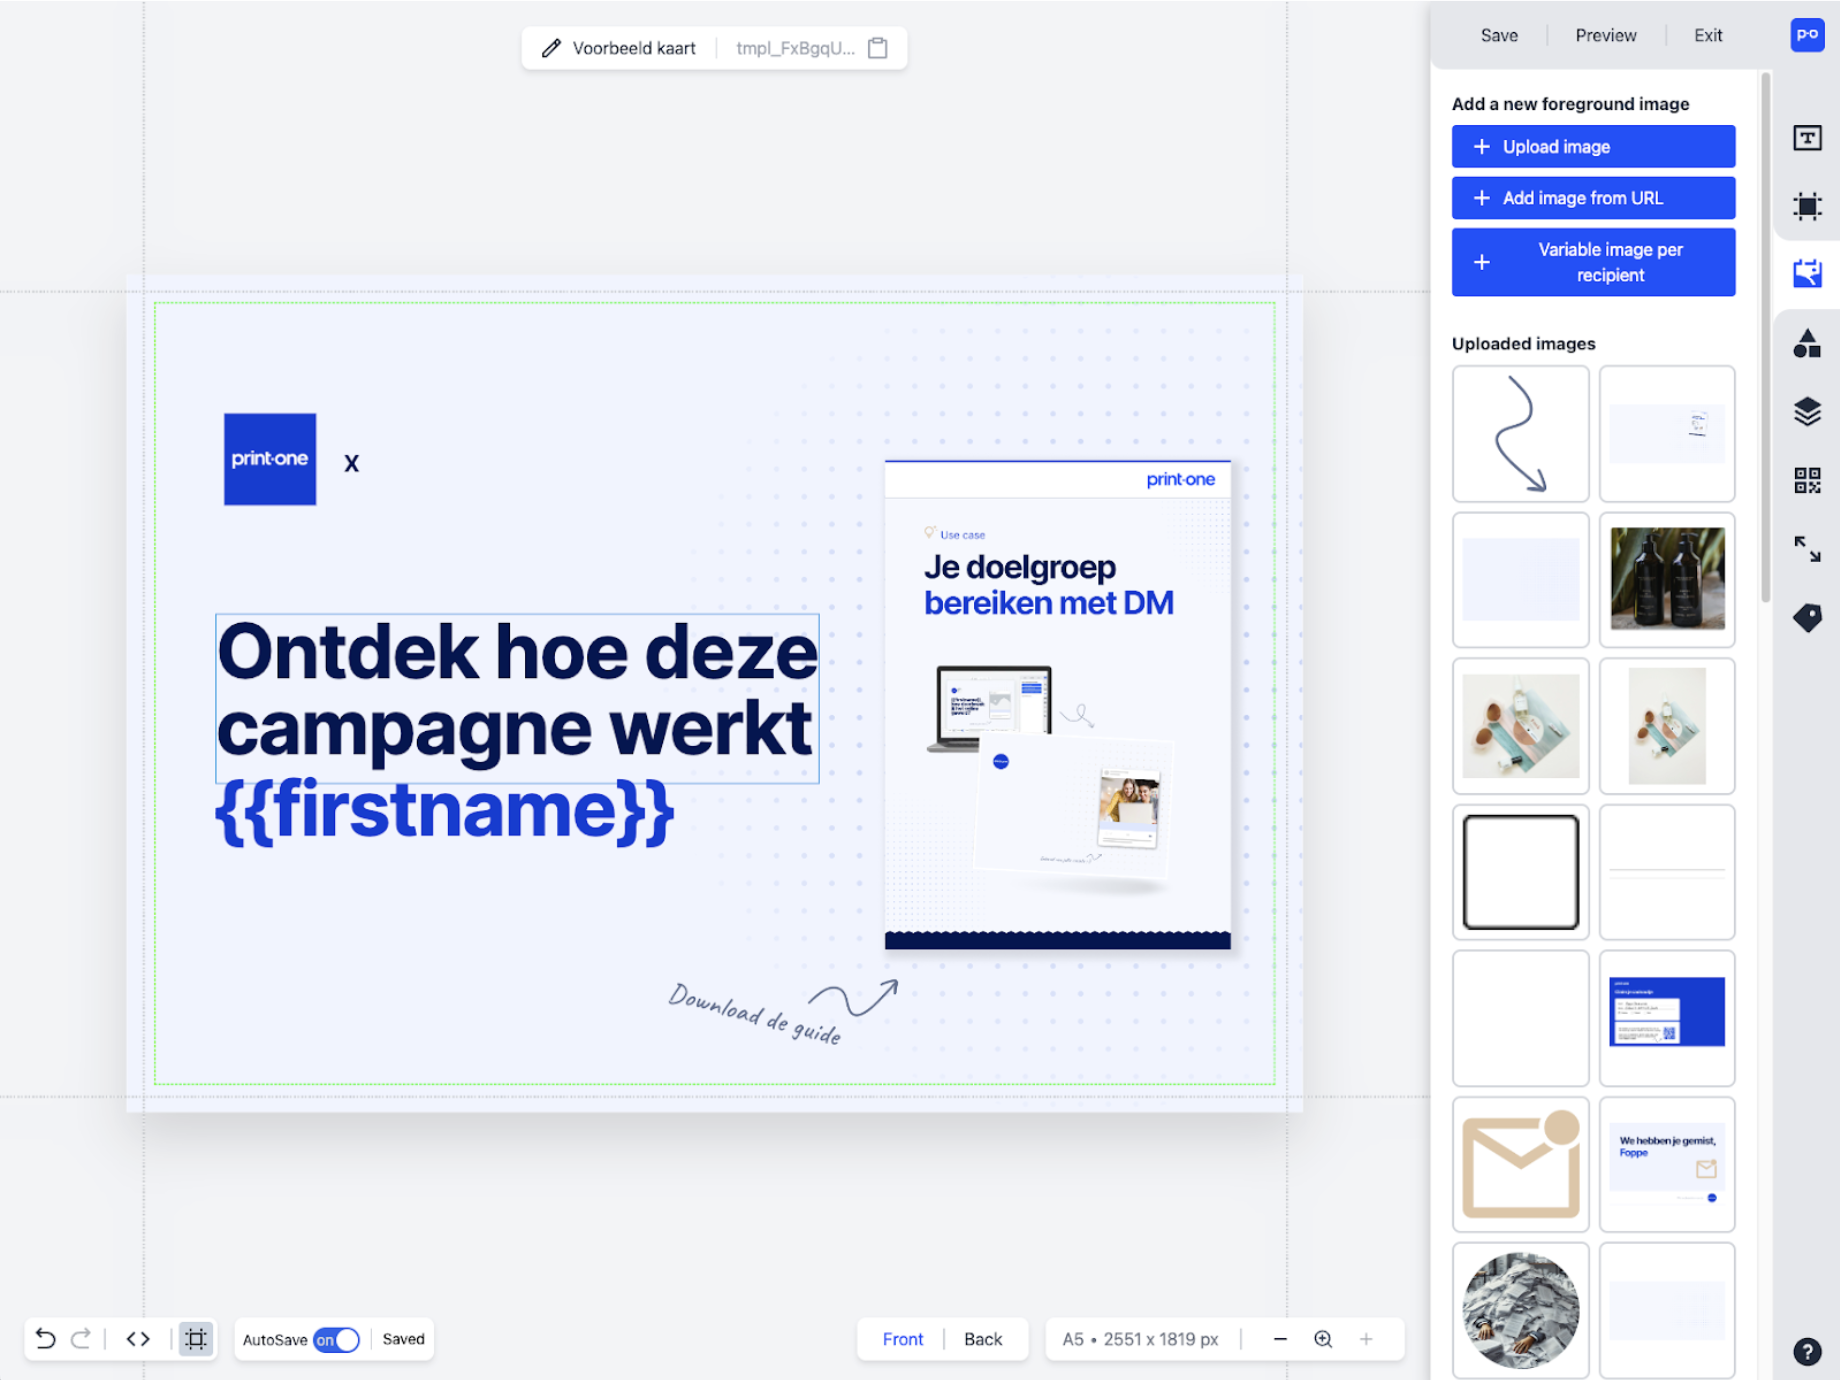
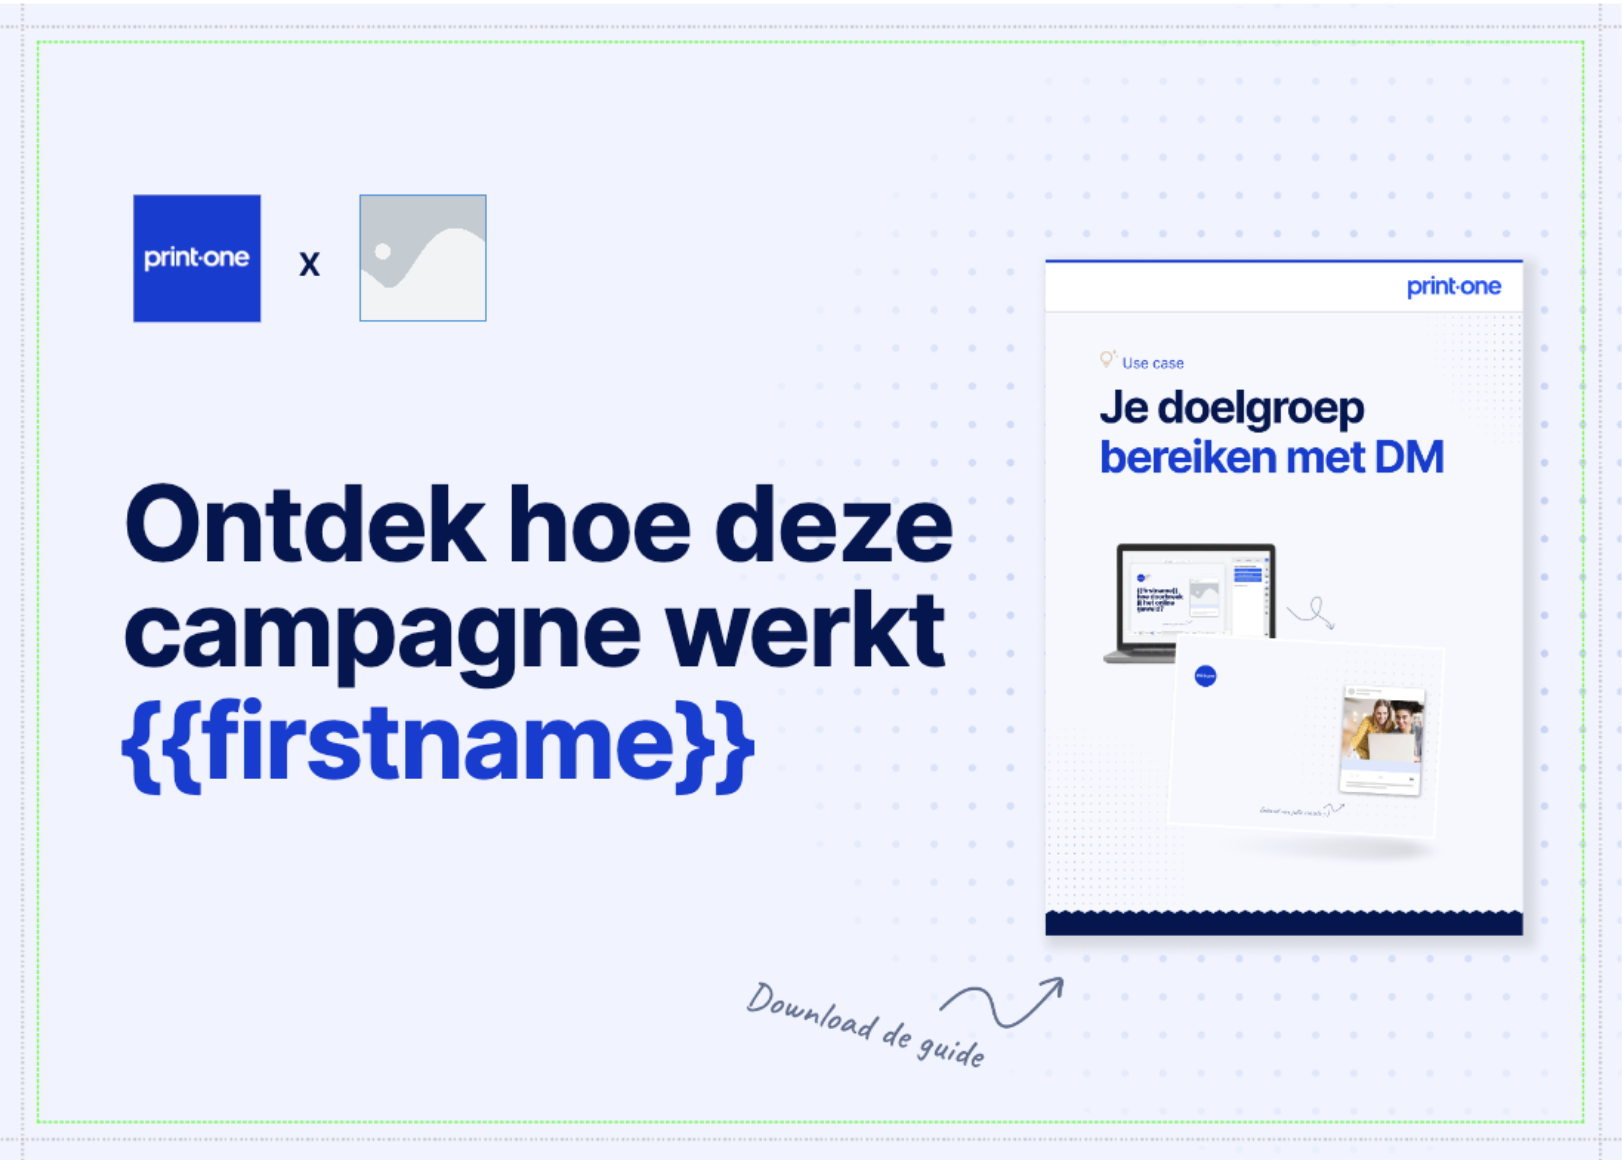
In this example, we have already placed a square logo of Print.one. This logo will remain fixed, but next to it we want to place the recipient's logo.
To do this, click on 'Images (foreground)' in the right-hand menu bar, and then click on the 'Variable image per recipient' button.

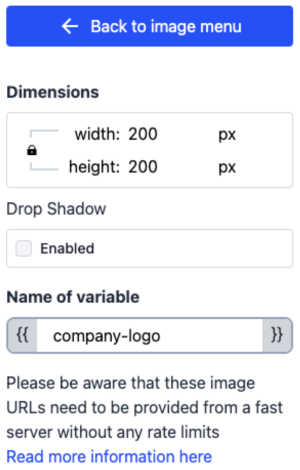
Since we want to use square logos, we are setting the size to 200 by 200 pixels for now. Of course, this can be any desired size.
Next, we give the variable a name by filling in the 'Name of variable' field. For now, we'll enter 'company-logo' there. Then, click 'Place image' and position the gray image placeholder in the desired spot on your card.
Now we are going to make a small code adjustment. Don't worry, we'll guide you through it.
4. Referencing variables to your logos in the Print.one account
Still with us? Great! In the previous step, we added a variable image. This already works if you have stored the logos in your own online storage. You can then reference the correct logos with links. However, in this example, we have stored the logos in your Print.one account. To use those, we need to make a small adjustment.
In the bottom left, you'll find a button to edit the code. It looks like this.
When you click on it, you'll see something that looks like this:
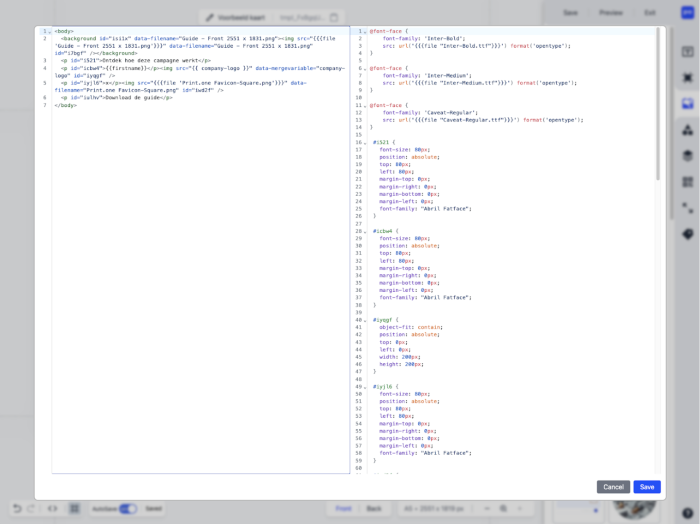
There, we can find the created variable image that we named ‘company-logo’. We need to make a small adjustment to this piece of code. Change this: {{ company-logo }} To this: {{{ file company-logo }}}
Click ‘Save’ and that’s it! We have now instructed the system to look for images within our Print.one account, instead of an external server.
5. Import CSV and Link Variables
Now switch over to Drip Orders, as we are going to link the columns in your CSV file to the variables in your card. Click ‘Import’, CSV, and then ‘Next’. Upload your CSV and select your created design in the next step. Go through the process of mapping your address data.
In the ‘Personalize Cards’ step, we’ll make sure the correct logo is loaded. For this, we created the variable image ‘company-logo’. In that field, select the data from the company name column and add .png as additional text. Make sure to remove the automatically added space. Your field should then look like this:
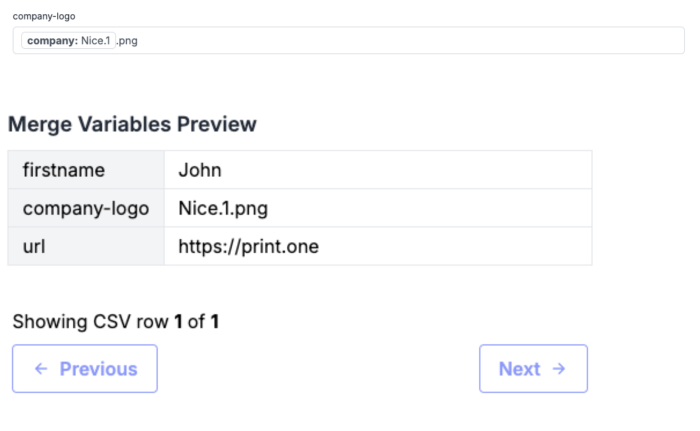
Check if everything went well by clicking on ‘Next’ and reviewing the preview.
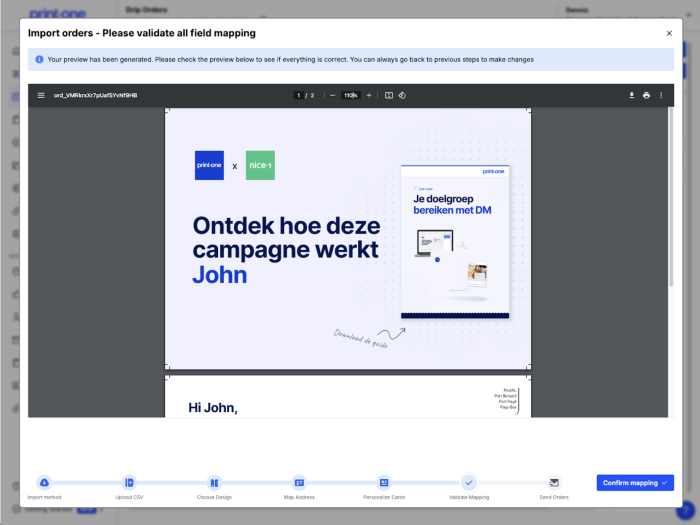
Your card should look something like this. Personalized and ready to delight your recipients.